When remodeling your bathroom, you’re probably more concerned about the cabinetry, the fixtures, and the tile than you are about making it handicap accessible. This is only natural, but by putting a little thought into bathroom universal design now, you may save yourself some major hassle and expense in the future.
I'm perfectly able-bodied. Why do I need universal design?
As much as we want to be optimists, accidents can happen, and we all get older. Whether you break your leg, suffer from a back injury, or decide to care for wheelchair-bound parent, life is full of the unexpected and becoming handicapped or living with somebody who is handicapped can happen. If that situation should ever occur, it’s far less expensive and complicated to prepare now rather than deal with an unworkable bathroom layout later.
How You Can Make Your Bathroom Handicap Accessible Now
If you are planning a major bathroom remodel, your walls will be opened up, cabinetry will be removed, and your electrical and plumbing will be reworked. Now is absolutely the time to incorporate universal-design principles. The good news is, doing so is relatively inexpensive and won't change the look of your bathroom now. Your future self (or a future owner of your home, if you ever sell) may thank you for it.
- Blocking: When your walls are open, nothing could be simpler than adding extra blocking (construction-speak for lumber nailed between the studs in your walls) to support extra grab bars you may someday need to install near your toilet and in the shower. No need to worry about your bathroom looking like it belongs in a hospital: these reinforced sections of wall will be completely hidden by drywall and tile. Be sure to snap some photos of where the blocking is for future reference.
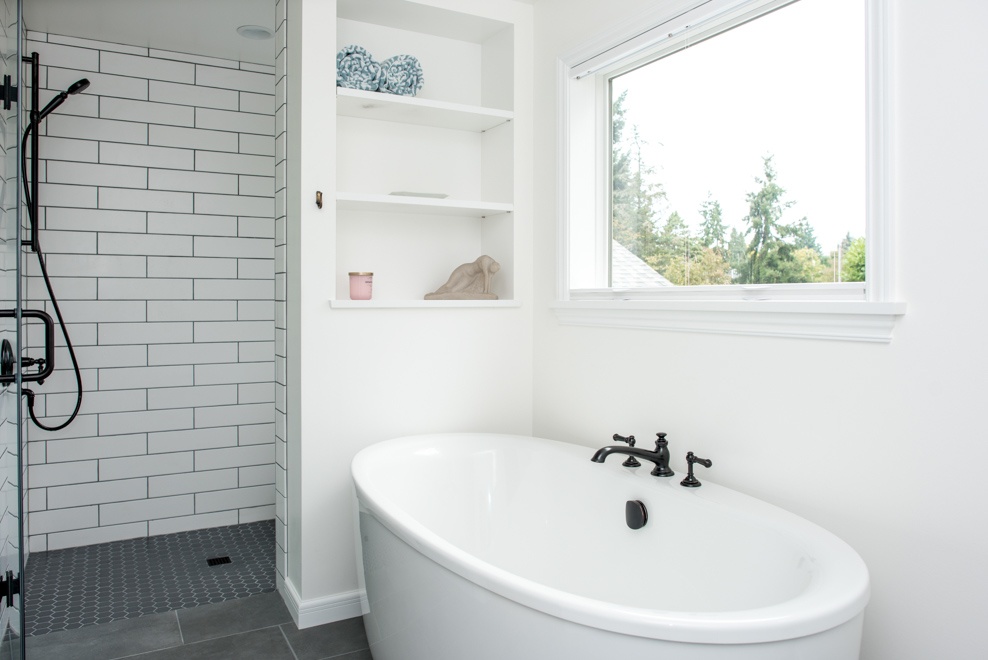
- Curbless showers: Here's a universal design concept that not only makes your shower accessible but looks amazing. Get rid of the bulky, hard-to-step-over curb in your shower and go completely curbless. See also: Should I Replace My Bathtub with a Shower?
- Wide doors: Ask your designer to specify 36" wide doors rather than the standard 32". The cost difference will probably be under $100 but could save you thousands if you ever need a wider, wheelchair-accessible door in the future.
- Lose the shower door: If you opt for a walk-in shower rather than a tub (a good choice), there's no reason you need to have a shower door, which can hinder people on crutches or in wheelchairs. With proper planning, a simple glass panel near the showerhead can do the trick. See also: What Is a Wet Bathroom?
- Lever-style handles: These are easier to turn than knob-style handles. They're great for people with limited dexterity, even kids.
- Slip-resistant tile: Look for floor tile rated COF (coefficiency of friction) 60 or higher. This tile won't cost any more than slipprier tile but is much safer.
- Shower bench: This is convenient at any stage of your life but is essential for anyone with limited mobility. You can get benches that fold up and out of the way.
Because the bathrooms in our older Seattle homes tend to be small, I've focused here on concepts that can be applied to nearly any bathroom. The Americans with Disabilities Act lays out other guidelines relating to wheelchair turning radius, grab bars, etc.
If you'd like to explore ways to make your bathroom accessible, feel free to get in touch. We are always happy to help.
Denny Conner, the founder of CRD Design Build, is a Certified Aging in Place Specialist.